
Fingerpicking the Blues
This lesson introduces the use of fingerpicking in Blues. Before attempting the following lessons it would be helpful to have some previous experience of fingerpicking. Progressive Fingerpicking Guitar is recommended as an introductory manual to fingerpicking. Study the following points of fingerpicking basics.
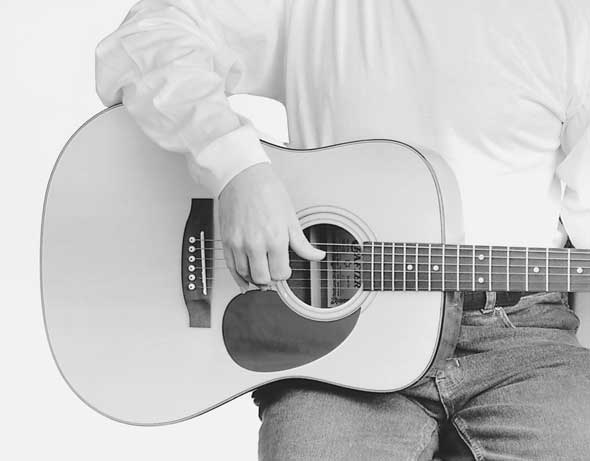
Right Arm Position
The correct position for your right arm is shown in the photograph here. Notice that your forearm rests on the upper edge of the guitar, just below the elbow. Be careful not to have your elbow hanging over the face of the guitar, or your right hand too far along the fretboard.
Correct

Incorrect
Right Hand Position
Study the following photographs for the correct hand position.
- Rest the forearm on the upper edge of the guitar.
- The right hand is at 90 degrees to the strings.
- The thumb is parallel with the strings and clear of the other fingers.
- Pick the strings over the Sound hole for the best sound.
- Do not rest any part of your hand or fingers on the guitar body.
Front View

Side View
Picking the Strings
It is best to fingerpick the strings with your fingernails as this gives a better sound. You should let the fingernails of your right hand grow to a length that is comfortable for your playing e.g. 1/16" (1 millimetre) clear of the fingertip. The thumb nail should be longer. Fingernails should be shaped using a nail file (emery board) so that they have a rounded edge and flow smoothly off the string after it has been picked.
Right Hand Finger Names

The right hand fingers are named using the following fingering symbols.
- p = primary
- i = index
- m = middle
- a = anular (ring finger)
The little finger is not used in fingerpicking.
Picking with your Right Hand Fingers

Start with your fingers not touching the strings, then pick the third string with your index finger (i) with an upward motion (do not pull the string outwards). Your finger should move from the first finger joint below the knuckle as shown in the diagram that follows. The sound is produced by the fingertip and the nail striking the string simultaneously. Move only your fingers, not your hand. The i, m and a fingers usually pick the 1st, 2nd and 3rd strings.
Picking with your Thumb
The p finger (thumb) usually picks the 6th, 5th and 4th strings. Pick with the lower side of your thumb as shown in the photograph. Pick with a downward motion and keep the thumb rigid, i.e. do not bend it like you do when picking with your fingers.
